Spider Mites On Weed: Guide To Identification And Mitigation
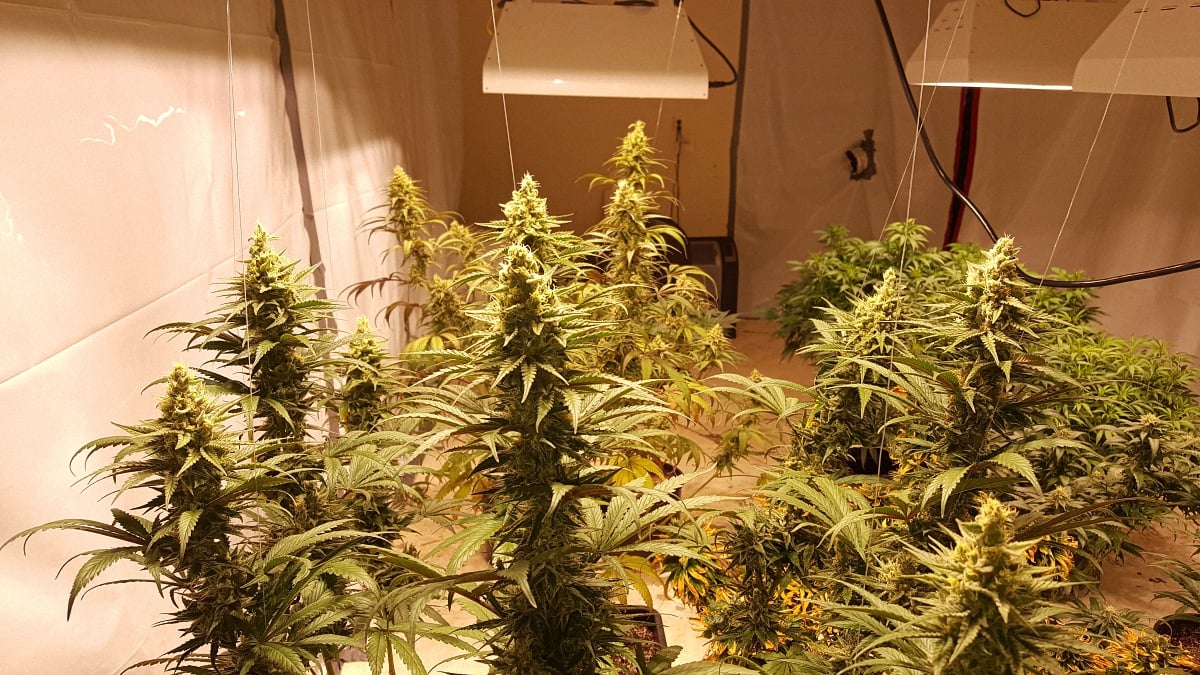
You’ve read everything you can, bought all the right equipment, and finally set up your own grow room or outdoor garden. The lighting and ventilation is right, you’re caring for your plants properly, and you’re watching them grow as you eagerly await your flowers and buds to appear.
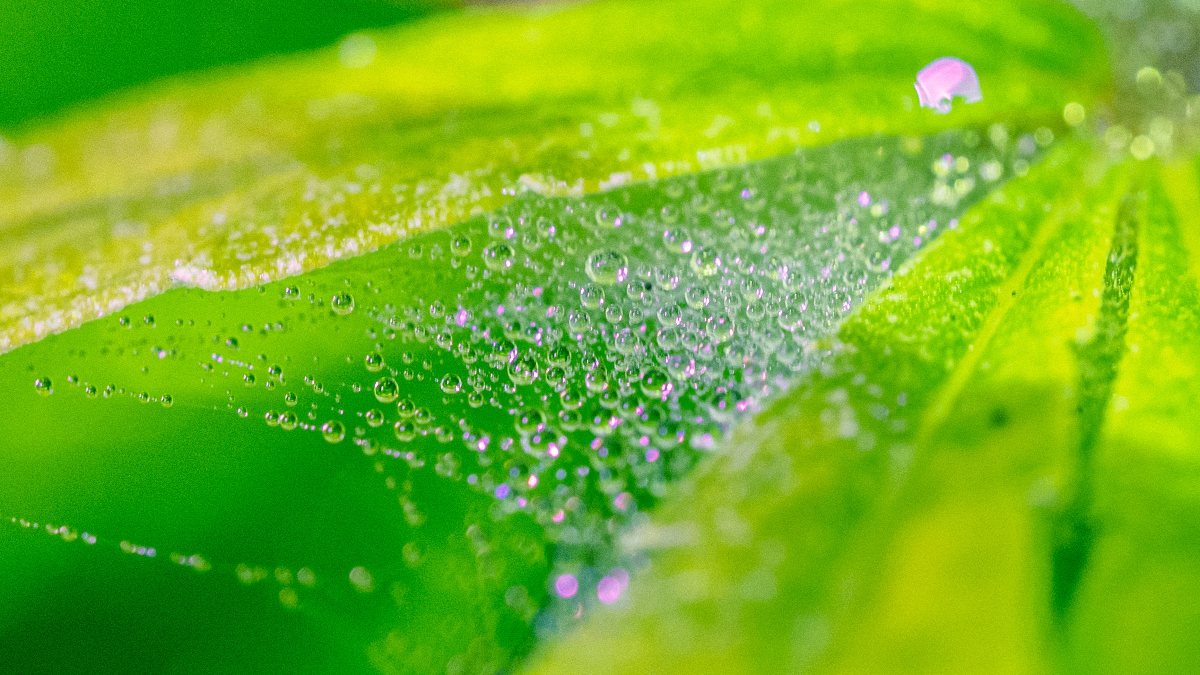
Suddenly, your plants seem to stop growing and start drooping. You notice brown spots on the leaves, and then something that looks like spider webs begins to appear. You’ve been doing everything right – so what’s the problem?
Your beautiful crop has probably been invaded by one of the worst enemies of marijuana plants: spider mites.
It’s not necessarily your fault. Spider mites are among the most common pests which prey on cannabis.
But you’ve got to act quickly to save your plants.
What are Spider Mites?
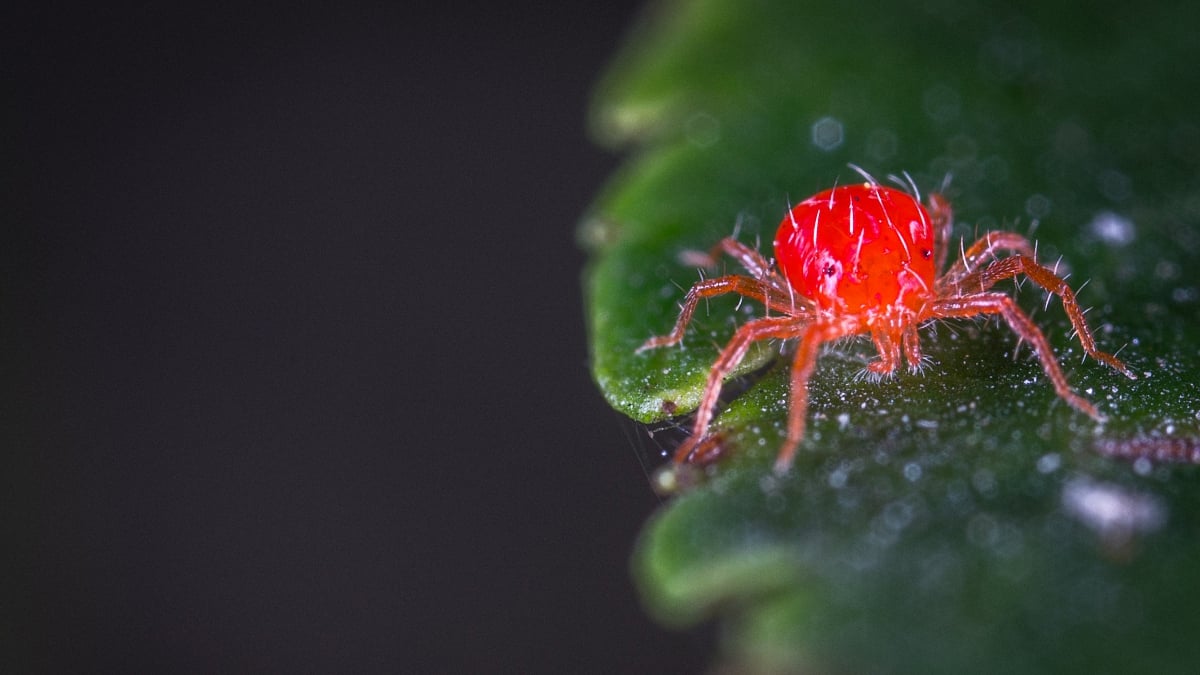
Their name is apt. Spider mites are tiny eight-legged arachnids similar in appearance to spiders, with colorful oval bodies, no antennae and sharp fangs that they use to penetrate leaves and suck out the contents. They’re most likely to focus on pot plants that grow in soil, but a hydroponic grow is no assurance that spider mites won’t become a problem.
Three key features of these mites make them so insidious.
- They’re incredibly tiny, so small that most growers don’t notice them until they become an infestation.
- They feed primarily on chlorophyll, which is readily available in a marijuana garden or grow room.
- They multiply unbelievably quickly and are ridiculously prolific. After eggs are laid, the mites hatch in just a few days and reach sexual maturity a few days after that, so a new generation of spider mites is spawned every eight days. And a single mite can lay millions (that’s not a typo) of eggs every month.
It’s easy to see that “infestation” is exactly the right word to describe what happens when spider mites set up in the middle of your grow. A plant that’s alive can be dead by the time you wake up the next morning, and an entire crop can literally be destroyed in a matter of days.
Making things worse, spider mites are very difficult to kill. They’re immune to many common pest treatments and they rapidly adapt to other attempts to destroy them. Worst of all is “The Borg,” a two-spotted spider mite that can seem to be invincible.
That doesn’t sound like a pretty picture – and it’s not. Most growers have horror stories about spider mite infestations and their desperate attempts to mitigate them.
There are ways to get rid of spider mites, though. We’ll get to those after we first look at subjects that are just as important: how to keep these mites away from your plants, and how to identify them as soon as they set up shop.
Preventing Spider Mites from Finding Your Grow
There are some common-sense steps you can take to minimize the possibility of having to deal with a spider mite invasion.
- Start your plants from seed instead of clones, so you aren’t behind the game immediately. If you start with live plants, inspect them carefully as soon as you obtain them (a handheld microscope is a great tool to use), and dip their leaves in a solution of cool water and a soap that kills mites.
- Put a filter into the air intake of your grow room ventilation system and make sure there’s good airflow throughout the space, keep the temperature as low as you can without hurting the plants (spider mites like it warm), and clear away all dead leaves immediately.
- If you’re using soil as your growing medium, organic compost mulch can be one of your best friends because it contains other mites that feed on spider mites. Another good friend will be ladybugs, which also feed on the pests. You can also spread diatomaceous earth on the soil because its jagged edges will rip spider mites apart if they come in contact with it.
- Spider mites are much more likely to set up shop on plants growing outdoors, so never bring an outdoor plant into your grow room. If you absolutely have to bring one in (for example, if you have a clone), quarantine the plant for two weeks and monitor it carefully first.
- Similarly, brush yourself off completely before coming into your grow room, to lower the chance that spider mites are hitching a ride. Don’t let pets in, either.
Despite your best efforts, there’s a good chance that you’ll have some unwelcome eight-legged visitors sooner or later. Here’s how to keep a close eye out so you can nip the problem in the bud (please forgive the pun).
Identifying Spider Mites on Your Weed Plants
You’re not going to notice spider mites at first. They’re so tiny that each one can be as small as 1/64th of an inch; at best, they may look like random, unidentifiable spots. As the infestation grows, you may start seeing a bunch of “speckles” close to each other; before long, the leaves will take on a yellow or brown splotchy appearance, and after that, the mites will start spinning their easily-identifiable webs. By that point, you’ve got a difficult battle on your hands.
If they’re so hard to identify, how do you stay ahead of them? Start by inspecting your plants carefully on a daily or every-other-day basis – that handheld microscope we mentioned will come in very handy. Yes, you may look and feel like a weed nerd, but isn’t that preferable to losing your crop?
When inspecting, focus your search on the underside of the leaves, which is where mites like to congregate and spin their webs before laying eggs. If you have a good microscope you may be able to see the mites, but you’ll probably have better luck looking for the tiny white or yellow specks where spider mites have pierced the leaves. At the very least, be vigilant in the search for groups of specks, or slight discoloration of the leaves. That should be enough to sound alarm bells in your head and trigger a mitigation strategy.
It’s still possible that you’ve missed the early warning signs, even with close-up inspections. In that case, leaves that appear to be changing color, plants that start to wilt, or of course, webs on the plant will leave no doubt: you’ve got a big problem, and you’d better get to work quickly.
How to Get Rid of Spider Mites on Your Plants
The earlier you discover the invaders, the easier it will be to eradicate them. But don’t panic; even full-blown infestations can eventually be eradicated as long as you keep at it.
The first step is trying to physically remove the mites from your plants, and you should do this several day in a row to make sure you get them all. You can use a powerful spray of water to try to knock them off (make sure it’s a spray and not a jet of water, so it won’t damage the plants), or use a handheld vacuum to clean each leaf individually. Taking the plants outside might be the best idea, so loose mites aren’t left inside the grow room. Be sure to place everything that’s fallen off the plants or the contents of the vacuum bag into a zip-loc bag and freeze it before disposing of it, to make sure the mites are dead.
Next, set up fans to blow onto the plants. Believe it or not, that will stop the mites from mating, and it will also help spread the more serious treatments that we’ll be discussing.
Unless you’re positive there are no spider mites left on your plants (and no eggs under the leaves), they should be sprayed. There are a number of solutions you can spray with; it’s often best to use one for a few days, then switch to a different one so the mites can’t develop immunity to the treatment. Continue alternating the treatments even after the mites are gone since there still may be eggs left to hatch and you’ll be infested all over again. Use a mister for each of these solutions.
- One tablespoon of bleach mixed with a gallon of warm, pH-balanced water
- 1½ cups of alcohol mixed with a gallon of warm, pH-balanced water
- Nicotine tea (15 grams of organic tobacco steeped overnight in hot water)
- 3 cups of neem oil extract mixed with a gallon of warm, pH-balanced water (don’t get this one on your skin or breathe it in, and it may leave a nasty smell on buds)
If you’ve gone through 3-4 of these treatments (about ten days’ worth) and mites are still on your plants, it’s time to pull out one of the big guns.
- AzaMax broad-spectrum natural insecticide, sprayed fully on the plants each night
- Spinosad organic soap or insecticide, sprayed on the plants once per day
- Another type of insecticide soap (just spray the leaves, not the buds)
In worst-case scenarios (which will probably only come into play if you’ve got Borg mites), insecticide sprays containing pyrethrum or Floramite Spidercide will definitely kill spider mites, but can be toxic to humans – so if you have to resort to them, be very careful and follow directions carefully. One drawback: these alternatives will also kill any ladybugs you’ve brought in to help control the mites.
It’s important to remember: these buggers are prolific and have probably left a lot of eggs hidden underneath the leaves of your plants. Even if you think the outbreak has been mitigated, keep treating for a few more weeks to be sure your grow is completely safe.
Don’t give up on growing your own cannabis if you have to deal with a tough spider mite infestation. If you have a car it will eventually break down; if you buy a house you’ll eventually have to deal with a blown hot water heater or a leaky roof. And if you grow pot, you’ll eventually have spider mites.
There are trials and tribulations associated with anything worth owning, and your own weed plants are definitely worth owning. Just chalk it up to a “cost of doing business” – and look forward to the great war stories you’ll have to tell other newbie growers down the road.